Sunday, 31 January 2016

Apple Caramel Crunch Cake

October 30, 2013
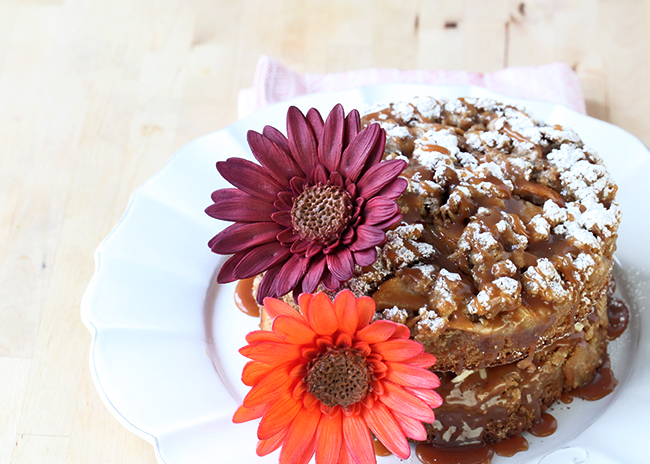
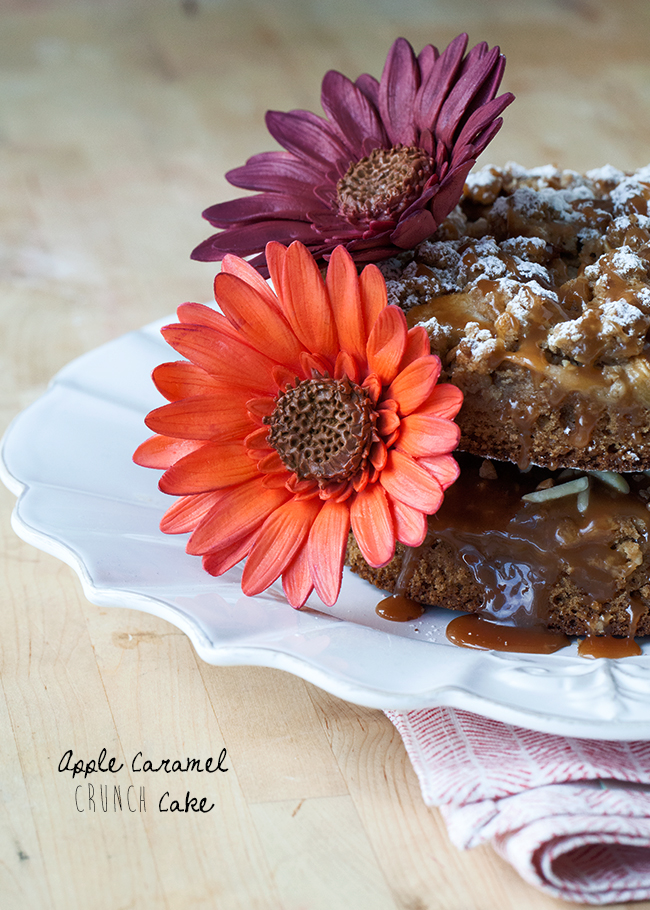
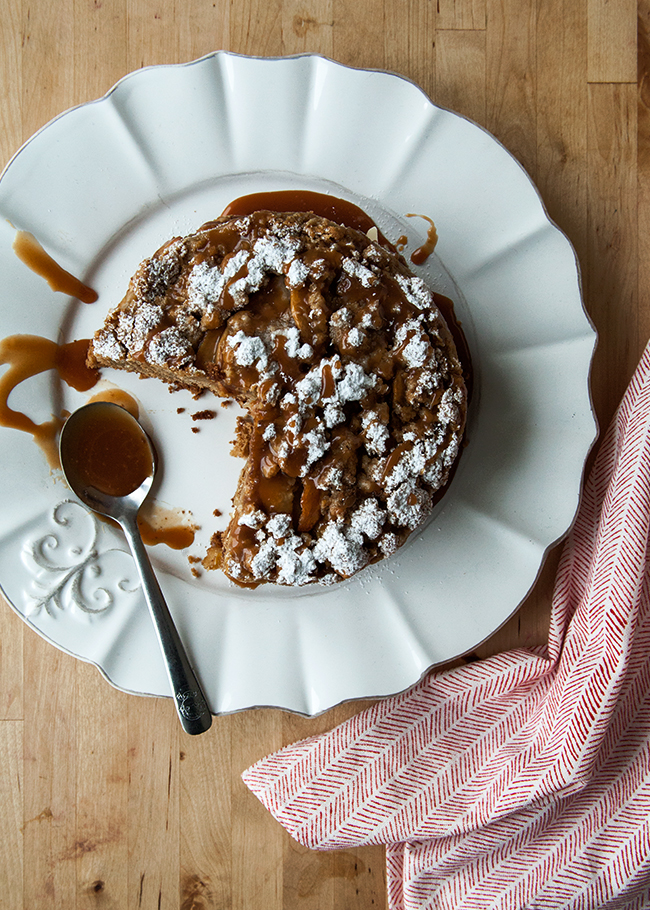
Apple-Caramel-Crunch-CakeThis cake started out as an idea.  I've been seeing a lot of photos of a dish that's been dubbed "Apple Pie Cake."  I believe I saw this beautiful Martha Stewart version that got me thinking beyond the apple spice cake that I make every year.  My apple spice cake just might be in my top 3 cake flavors.  I love the moistness the apples leave and warm flavors of fall it brings.  But for this treat, I wanted to combine my love for apple layer cakes and this new apple pie cake- thing.
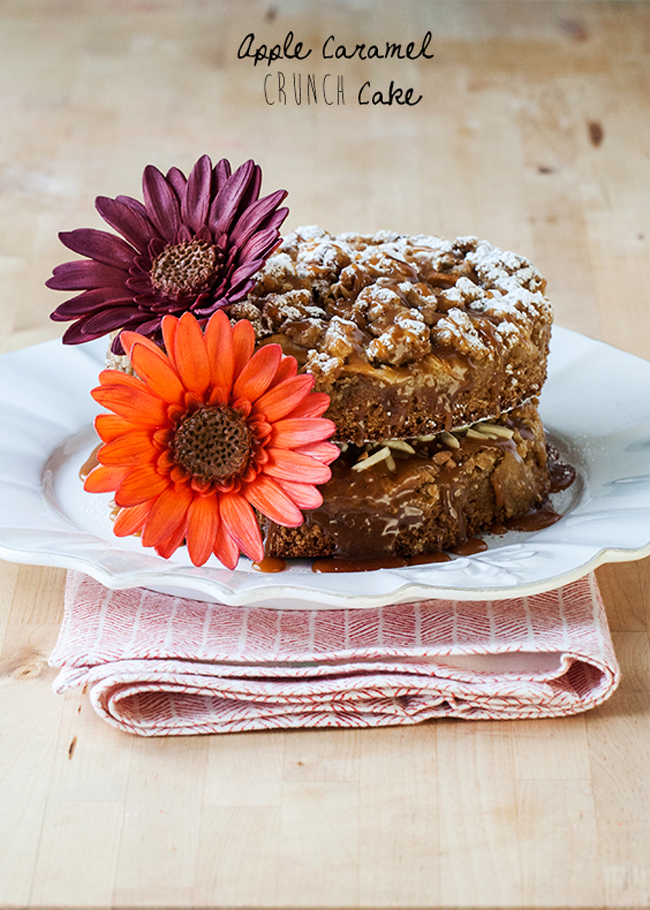
While brainstorming, I acutally named this cake before coming up with all the components.  Apple Caramel Crunch Cake- now that sounds like something I would want to eat.  Of course, apples and caramel go together like milk and cookies.  And adding a crunch element just might take it over the top!  I re-vamped an apple spice cake to layer the apples on top of the cake base and include an oatmeal crumb on top.  The cake was then layered with homemade salted caramel, sliced almonds, and toffee bits.  And thus, the Apple Caramel Crunch Cake was born!  No additional frosting required.
Okay.... just a touch of confectioner's sugar then ;)
Apple-Caramel-Crunch-Cake
[amd-zlrecipe-recipe:35]
Recipe from Baking a Moment.
Apple Caramel Crunch Cake
Loving these bold daisies as much as I am?  Well, they are made from sugar paste!  AND you can now find them on my Etsy shop. 
Apple Caramel Crunch Cake

[amd-zlrecipe-recipe:36]
Recipe adapted by Ricardo Cuisine.

Comments (1)

Oldest First 
Preview POST COMMENT…
[…] Apple Caramel Crunch Cake Apple crumb cake layered with salted caramel and toffee bits.For full “Apple Caramel Crunch Cake” recipe click here […]

Caramel Crunch Cake by LaRocca


This was the challenge.

And this was my answer...


I've seen this cake in Loblaws, I always wanted to buy it... but as you know, I'm frugal and this cake was $14.99 for a 7" cake. How could I possibly pay $15 for a wee little cake! It's not like spending $23 for a glorified rubber chew toy for the baby (I'll get to that story one day). After years of starring this cake down behind the bakery glass, I finally bought it. (to be accurate, K bought it, I think I would have chickened out at the cash). Let me tell you... this cake was worth the wait. It was fantastic! I was in trouble, because there is no way I could ever bring myself to buy the $15 cake again.

I accept the challenge!

Hazelnut Meringue 
What I did What I would do next time
4 egg whites 5 egg whites
3/4 cup white sugar 3/4 cup white sugar
1/4 walnuts 1/4 cup hazelnuts (or walnuts)
2 Tbsp corn starch 2 Tbsp corn starch 

Preheat oven to 250 C. Draw 2 8" circles on parchment paper and place on a cookie sheet. Beat the egg whites in a glass or metal mixing bowl (meringue will not form peaks in a plastic bowl) until soft peaks form. Slowly add white sugar and beat until hard peak forms. In a food processor grind nuts and corn starch together until it reaches the consistency of corn meal, or a little bit bigger. Fold the nuts into the meringue. Place meringue in a piping bag (or a ziplock bag as I did). Pipe meringue in a spiral fashion onto the parchment paper circles. Bake in the oven for 1.5 hours or until the meringue is hard throughout. Remove from oven, remove parchment paper when meringue is cool enough to touch, place on a cooling rack.

Caramel
(2) 1 can of sweetened condensed milk

Use one of these methods to make the caramel. I used two methods, I wasted 1.5 hours cooking the milk in the oven. It wasn't the right color when it came out, so I put it in the microwave for another 8 mins in 2 minute intervals. Next time I would cook the caramel using the microwave method or the stove top method, and I would cook it until it was a bit darker and richer in color.
Refrigerate the caramel until cool (approximately 3-4 hours depending on the size of the bowl).

Stabilized Chantilly Whipped Cream
(basically this means a thicker (stabilized) sweetened (Chantilly is a fancy way of saying the whipped cream has sugar in it) whipped cream)

2 cups 35% cream
1/4 cup white sugar (optional)
2 packets of Whip It (in the baking aisle)

Make sure all of your ingredients and your bowl are very cold. Add the Whip It to the cream and beat until soft peaks form. Slowly add in your sugar. Beat until hard peaks are formed. Do not over beat or your cream will turn into butter. Next time, I might try to stabilize the whipped cream with gelatin, I think it might result in a more firm cream that holds up longer, but I would like to test it first.

Assemble the cake just prior to serving. Divide caramel in 2 portions, leaving about 4 Tbsp aside for garnish. Spread caramel onto both of the cooled meringues, pipe whipped cream on top of the first layer. Place the second meringue on top, pipe whipped cream on top. Using the caramel you set aside, place it in a ziplock bag and add a design on the top of the cake. Refrigerate until serving.

$2.99 Condensed milk
$3.49 whipping cream
$1.29 Whip It
$1.25 eggs
Delicious cake... priceless!

Really me,
Challenge completed
How to BBQ a Rabbit

 | By 
How to BBQ a Rabbit
A plate of cooked rabbit with broth and herbs. Photo Credit Maria_Lapina/iStock/Getty Images
Rabbit meat, which is sold year round, can be found fresh or frozen in specialty grocery stores or on the Internet. It is high in protein and mildly flavored. Rabbit can be prepared in the same fashion as other meats, such as chicken. Barbecuing rabbit meat on a grill will not only cook the meat efficiently, but it will also help impart a smoky flavor and tender texture.

Step 1

Cut up your rabbit into eight total pieces; four legs, two loin pieces and two rib pieces. Place all of the pieces into a bowl and add 1/4 cup of olive oil. Rub the oil into the rabbit to evenly coat it.

Step 2

Combine minced garlic, salt, pepper and chopped rosemary in a large resealable baggie or bowl. Toss the rabbit pieces with the spices until they are completely covered with the mixture. Seal the bag or bowl and place the rabbit in the refrigerator to marinate for at least two hours.

Step 3

Remove the rabbit pieces from the marinade and allow them to come to room temperature.

Step 4

Preheat your grill to medium high.

Step 5

Mash rosemary leaves, garlic, 8 tbsp. of olive oil, lemon zest, lemon juice and honey in a liquidizer or with a mortar and pestle until it turns to a pulp. Brush this marinade onto all sides of your rabbit pieces.

Step 6

Position the rabbit pieces on the grill and baste with the marinade again. Cook for about 8 minutes.

Step 7

Turn the rabbit pieces over and baste again. Cook for an additional 8 to 10 minutes.

A Shortcut to Flaky Puff Pastry

Classic puff pastry takes half a day to make, but this shortcut version, called rough puff pastry, is ready to use in an hour or less

easy shortcut  puff pastry, ready in an hour or less
Quick puff pastry is ideal for crisp, buttery pastries and crusts. Begin with a hot oven (450°F) to get the puff and then lower the temperature to finish baking.
by Molly Stevens
fromFine Cooking 
Issue 23
When I was learning to cook, I thought of mastering puff pastry as a rite of passage from the merely eager to the expert. Making this delicate, flaky pastry usually takes at least half a day, but the result—hundreds of puffed, crisp, and buttery layers—was, in my mind, the ultimate kitchen achievement.
Then I discovered that most chefs use a shortcut method known as rough puff pastry  (also called blitz and half pastry) that takes only a fraction of the time. Though the results are not quite as spectacular in terms of height, rough puff pastry is just as irresistibly flaky, buttery, and tender as traditional puff pastry.
Use rough puff pastry to make turnovers, mille-feuilles, cheese straws, and cream horns, or use it as a crust for tarts, quiches, and pot pies.
Video: Watch Abby Johnson Dodge demonstrate how to make rough puff pastry for an elegant Pear-Hazelnut Tart in a Puff-Pastry Crust.
What to Make with Puff Pastry  
Browse all recipes using puff pastry
Different means to similar ends
Classic puff pastry begins with a basic dough called a détrempe (pronounced day-trahmp) that is rolled out and wrapped around a slab of butter. The dough is then repeatedly rolled, folded, and turned. The goal is to distribute the butter evenly in sheets throughout the dough. When the pastry bakes, the moisture in the butter creates steam, causing the dough to puff and separate into many layers.
Making classic puff pastry takes a lot of time because the dough needs lengthy rests after the initial détrempe stage and between its many "turns" (each series of rolling, folding, and turning).
There are a few ways to abbreviate the process of making puff pastry, all with the goal of distributing bits of butter throughout the dough. The method I find most streamlined is a cross between classic puff pastry and basic pie crust. You cut the butter into the flour as if making pie crust, but instead of simply rolling out the crust, you give the dough a quick series of turns and folds as you would for puff pastry.

Pineapple tarte tatin with coconut and caramel sauce

Put a twist on the traditional tarte tatin by using pineapple and coconut.


Ingredients

For the tarte tatin

For the coconut and caramel sauce

To serve


Method

  1. Put the flour in a mound on a clean work surface and make a well in the centre.
  2. Add 250g/9oz butter and the salt to the well and work together with the fingertips of one hand, gradually drawing the flour into the centre with the other hand. When the cubes of butter have become small pieces and the dough is grainy, gradually work in the water and it is all incorporated. Don’t overwork the dough – you should have a marbled effect with the butter. Roll the mixture into a ball, wrap in cling film and refrigerate for 20 minutes.
  3. Flour a clean work surface and roll out the pastry into a 40x20cm/16x8in rectangle. Fold the top third down to the centre, then the bottom third up and over that. Give it a quarter-turn. Roll the pastry into a 40x20cm/16x8in rectangle as before, and fold it into three again. These are the first two turns. Wrap the block in cling film and refrigerate it for 30 minutes.
  4. Give the pastry another two turns, rolling and folding as before. This makes a total of four turns. Wrap it in cling film and refrigerate for at least 30 minutes.
  5. Preheat the oven to 200C/180C Fan/Gas 6. Divide the caster sugar evenly between two small ovenproof blini pans. Cook over a low heat without stirring, until the sugar has melted and caramelised in both pans, turning golden-brown (CAUTION: boiling sugar is extremely hot. Handle very carefully). Remove from the heat and put half the remaining butter in each pan. Stir gently. Place a pineapple ring into the caramel in each pan.
  6. Put the rolled out pastry on a clean, floured surface and cut out two circles slightly larger than the circumference of the blini pans. Cover each pan with a pastry round, pushing the edges down around the pineapple ring. Bake for 10-12 minutes, or until the pastry is golden brown and cooked through. Remove and leave to cool slightly.
  7. Meanwhile for the sauce, in a small saucepan heat the butter, brown sugar and golden syrup until combined and the sugar is dissolved. Bring to a gentle simmer, then remove from the heat and add lemon juice to taste. Stir in the cream and coconut liquor.
  8. Toast the flaked cocount in a dry pan for 1-2 minutes, taking care to ensure it does not burn.
  9. To serve, place a slice of each tart on a plate and top with a scoop of ice cream. Drizzle over the sauce and garnish with mint leaves and toasted coconut.